Amy Atlas DIY Vase Cover | Wedding Planning, Ideas & Etiquette | Bridal Guide Magazine
From SWEET DESIGNS by Amy Atlas. Copyright (C) 2012 Amy Atlas and The Stonesong Press, LLC. Published by Hyperion. Available wherever books are sold. All Rights Reserved.
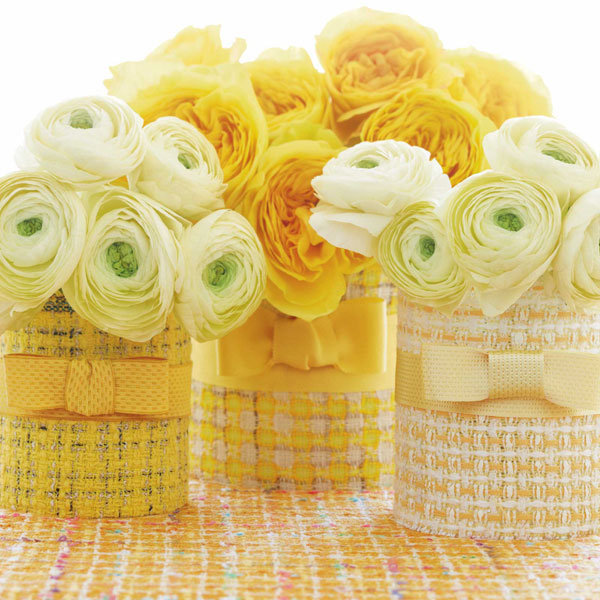
I used 6-inch-high glass cylinders with 5-inch and 3-inch diameters on this table, but I’ve written the instructions so that you can adapt the cover to whatever container you decide to use. You don’t have to run out and buy vases; large juice cans are a perfectly good option.
Materials:
- Tweed fabric in lemon, sunflower, and marigold shades
Glue Dots - Lengths of 1¾-inch-wide grosgrain
- Ribbon in complementary colors and patterns
1. To determine how much fabric you will need, measure the height and circumference of the vase. Cut a piece of fabric for each vase using the following formula:
- height × (circumference + 1 inch).
For example, for a 6-inch-high vessel with a 17-inch circumference, I cut a 6- × 18-inch rectangle of fabric.
2. For the band, bow, and bow band, cut lengths of ribbon using the following formula:
- Vase band = circumference + 1 inch
- Bow = 2 × desired length of finished bow (the bows pictured are 3 to 5 inches long when finished)
- Bow band = 5 inches long for the center.
3. Wrap the fabric around the vase, securing one edge to the vase with Glue Dots. Pull the fabric taut, allowing the edges to overlap, and secure other edge with additional Glue Dots.
4. To make the bow, form bow ribbon into a loop with the short edges overlapping slightly and secure the ends with a Glue Dot . Place a Glue Dot on the inside center of the loop where the edges overlap and pinch it together to make two loops. Wrap the bow band around the center and secure the loose ends with a Glue Dot. Affix the bow to center of the band of ribbon with another Glue Dot.
5. Wrap the band around the middle of the vase, positioning it so that the bow is directly opposite the seam in the fabric cover. Secure one end to the fabric with Glue Dots. Pull the ribbon taut, allowing the edges to overlap, and secure the loose edge with additional Glue Dots.
OPTIONAL: Arranging Ranunculus And Garden Roses
Ranunculus can be willful! To arrange them and garden roses beautifully, first fill a vase to ¾ full with cold water.
1. Cut each stem (there are several dozen in total of the flowers on this table) about ¾ inch higher than the height of the vase.
2. Blunt each end with a hammer to allow maximum amount of water to travel up the stems.
3. Lay stems in your hand, one by one, until the size of the bouquet exceeds the width of the vessel by about 2 inches. Grasp them as you would a nosegay and slide them into the vase.
4. Arrange as necessary so that the blooms in the middle stand slightly higher than those around the rim.


0 comments:
Post a Comment